|
|
|
Installation Guide of Night Vision Infrared Dome Camera |
|
|
|
|
|
|
|
|
Click pictures to view the enlarged version... |
|
|
|
|
|
|
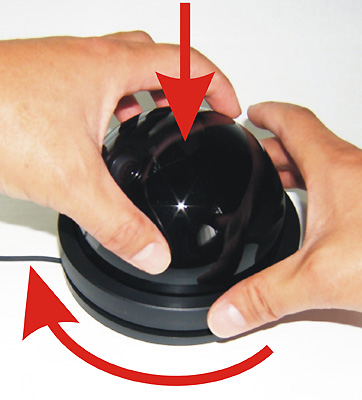
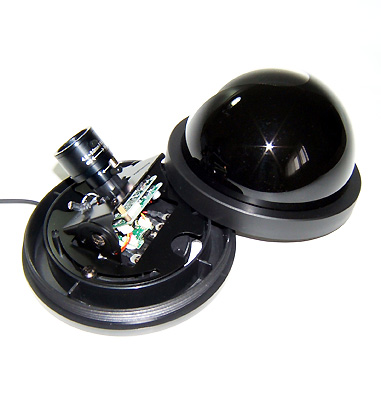
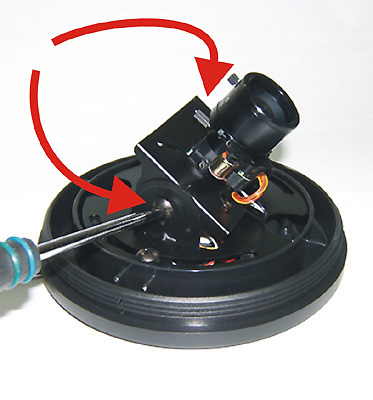
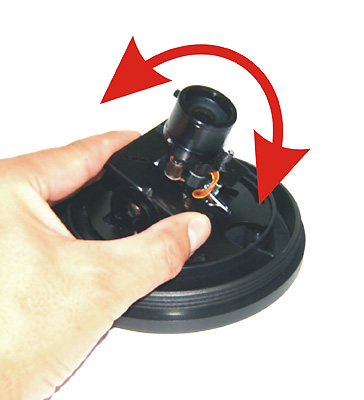
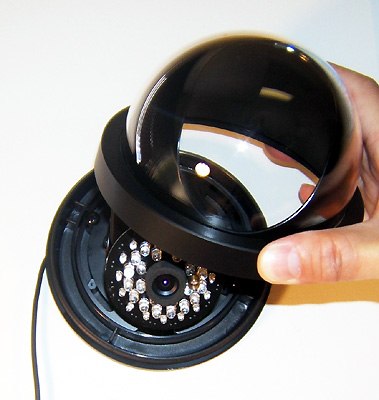
1. Unscrew the dome cover rim with one hand and holding the dome cover down firmly with other hand not to be turned in unscrewing motion of the rim as it shown on the left picture and remove the whole dome cover portion when the rim is unscrewed all the way. |
|
|
|
|
|
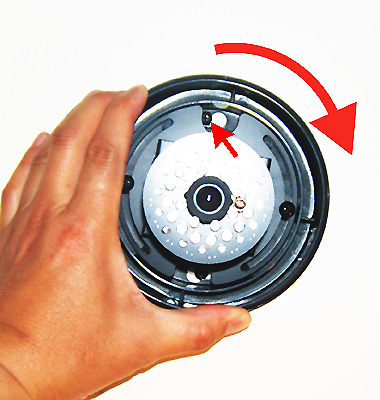
2. Locate the camera and affix the camera base using two screws included as it shown on the left picture. Make sure to insert the wire to the whole beneath the camera base before affix it on the wall if you plan to have wiring hidden going through the wall. |
|
|
|
|
|
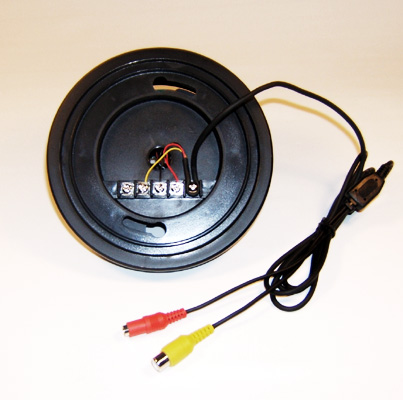
3. Layout the cable laying it behind ceiling, wall, or around corners of the room to the camera location from recording device or outcome display monitor and connect it with the video, power, and audio cable (if available) of the camera. |
|
|
|
|
|
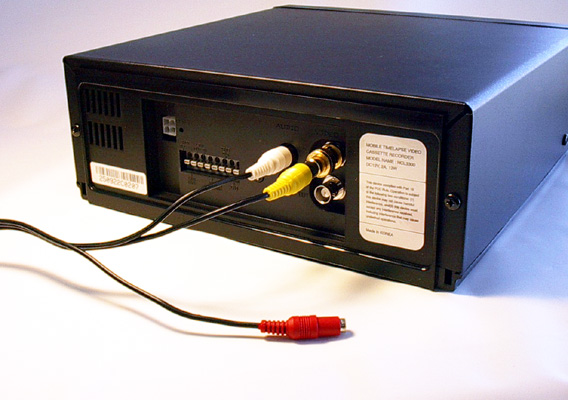
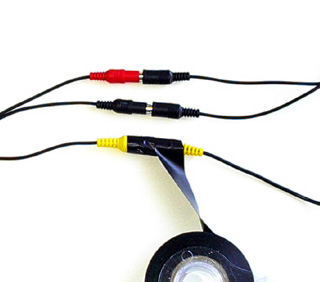
4. Connect the other end of the cable as Yellow to Video-in & White to Audio-in (if available) on the back of the recording device or outcome display monitor (if connecting directly to the monitor), then Red to the included 12V power transformer or your own 12V power source. |
|
|
|
|
|
5. Connect the other end of the cable to the outcome display monitor either directly from the camera or recording device (if the camera is connected via) as the connection procedure explained on 5 and power up all equipments that connected the system. |
|
|
|
|
|
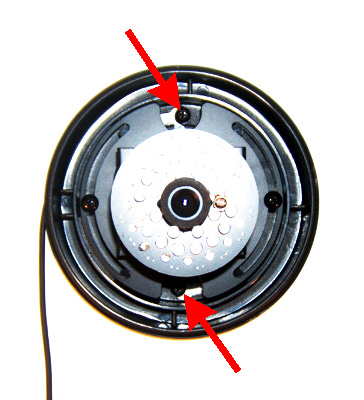
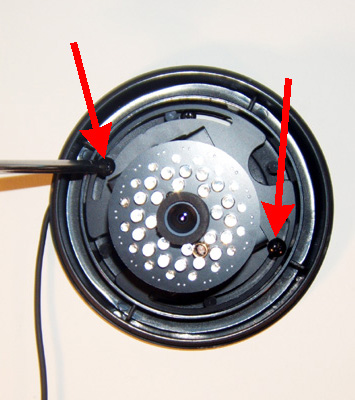
6. Go to the camera location and unscrew both sides of the lens holding base as it shown on the left picture to adjust the tilting angle. |
|
|
|
|
|
7. Unscrew both sides of the lens holding base as it shown on the left picture and adjust the tilting angle. |
|
|
|
|
|
8. IR light cannot be seen by human eyes and only possible to be seen through the connected display monitor. Thus, make sure to adjust a night viewing angle in the dark and so the IR vision can be seen through the monitor. Objects exposed to the IR light that are too close to the camera will produce a white glow reflection, so pay attention to put objects at least 10ft away from the camera. |
|
|
|
|
|
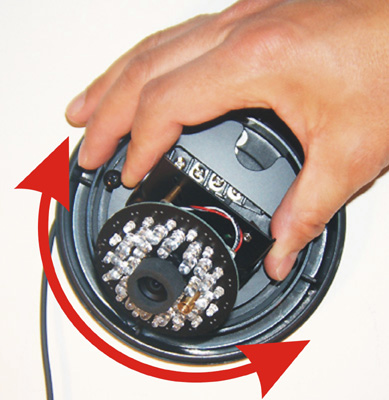
9. When the monitor location is out of viewable range from the camera, one more persons be needed to assist on correcting the camera-viewing angle, tilt, or pan adjustment while the other person is adjusting the actual camera angle at the camera location. |
|
|
|
|
|
10. Replace the dome cover in proper position not blocking the lens eye by the solid portion of the cover and screw back the dome cover rim with one hand holding the dome cover down firmly with other hand not to be turned in screwing back motion of the rim. |
|
|
|
|
|
11. At last, make sure to wrap around all cable connections securely with the electrical tape when wirings going through outdoor and intended to leave outdoor for long time. |
|
|
|
|
|
|
|
|
|
|
Home | About Us | Contact Us | Tech-Support | Product | Directory |
|
|
|
|
|
|
|