|
|
|
Installation Guide of Underwater Camera & Cable |
|
|
|
|
|
|
|
|
|
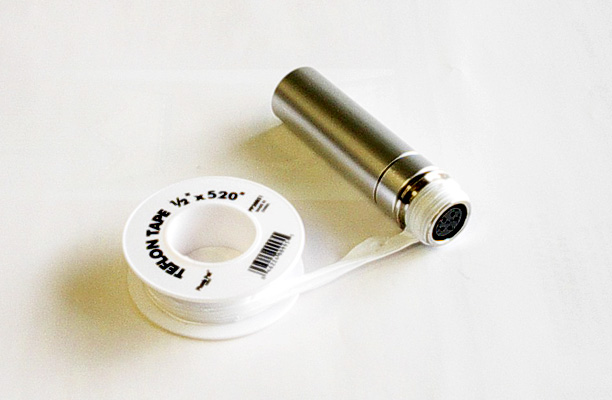
1. Wrap the thread of your underwater camera with Teflon tape. |
|
|
|
|
|
|
|
|
2. Plug the camera connector into the cable connector correctly and never force to plug in each other. It fits only one way and should be fit together smoothly. |
|
|
|
|
|
|
|
|
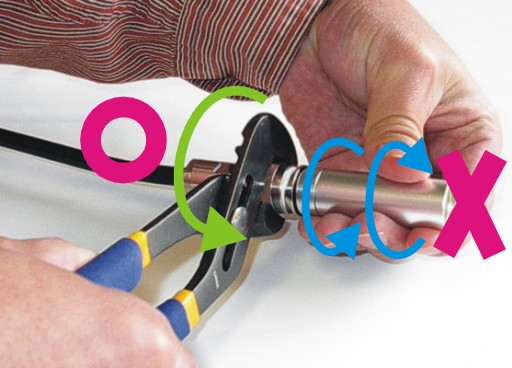
3. First hold the camera barrel exactly as it shown on the left photo and turn the screw cap of the cable connector clockwise with a pair of grip pliers. |
|
|
|
|
|
|
|
|
4. When tightening together, only the screw cap of the cable connector should be turned until it stops turning and the camera barren never should be turned, otherwise the wiring inside will break off immediately if the camera barrel is turned either way clockwise or counter-clockwise. |
|
|
|
|
|
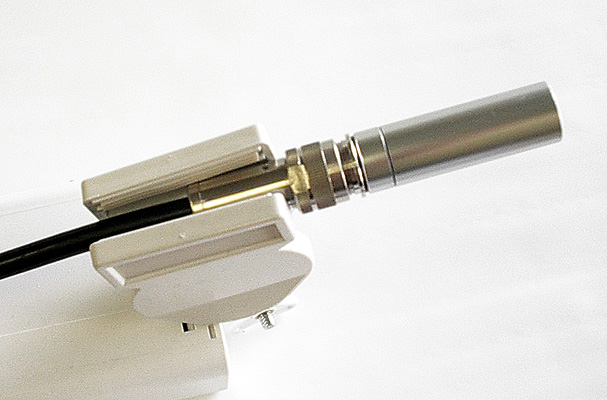
5. Stabilize your underwater camera in using any type of the grip brackets or fixtures, it must be gripped on the neck of the cable connector as it shown on the photo left. |
|
|
|
|
|
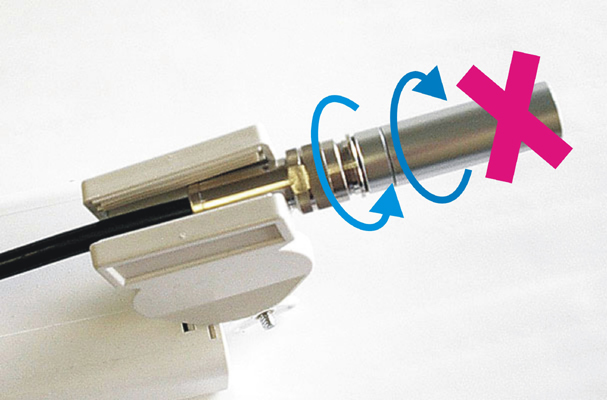
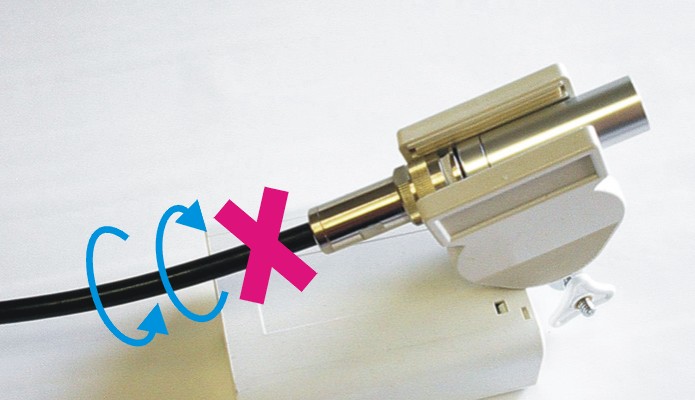
6. Never turn the camera head portion forcefully while the camera is gripped by a bracket or holding fixture, otherwise the wiring inside will break off immediately if the camera head portion is twisted counter-clockwise forcefully. |
|
|
|
|
|
7. Never
grip the camera head portion, the
wiring inside
will break off immediately
if the cable is twisted counter-clockwise
forcefully while the
camera head portion is gripped firm
by a brackets
or holding fixture.
|
|
|
|
|
|
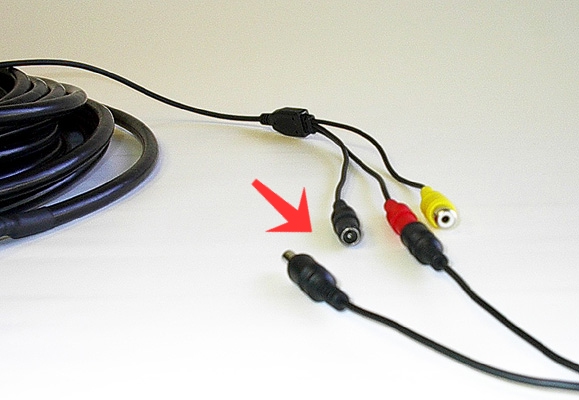
8. Leave the black cable jack unplugged when the camera LEDs are not necessarily to be turned on. |
|
|
|
|
|
9.
Connect the other cable endings as Red
(Camera Power) & Black (LED Power) to DC-12V power source
and Yellow
(Video) to Video input on a recording
or monitoring device.
|
|
|
|
|
|
10.
Go to the camera location and adjust viewing angle of the camera looking at the connected display monitor. |
|
|
|
|
|
11. When the monitor location is out of viewable range from the camera, one more person to be needed to assist on correcting the camera-viewing angle while the other person is adjusting the actual camera angle at the camera location. |
|
|
|
|
|
|
|
|
|
|
Home | About Us | Contact Us | Tech-Support | Product | Directory |
|
|
|
|
|
|
|